
Upgrading your 6.2 Denali with a cold air intake (CAI) system is like giving your engine a breath of fresh air. Not only does it enhance the performance by allowing your engine to breathe better, but it also gives you that satisfying growl under the hood, improved fuel efficiency, and a potential increase in horsepower. In this guide, we’ll walk you through the process of installing a CAI on your 6.2 Denali, ensuring you have all the information at your fingertips to do it right.
Contents
Pre-Installation Steps
Selecting the Right Cold Air Intake
Choosing the Best Cold Air Intake for 6.2 Denali. It must be compatible with your Denali’s model year and engine type. Opt for reputable brands that offer clear instructions and customer support. A good warranty can also be a lifesaver if you encounter any issues down the line.
Safety Precautions and Preparation
Safety first! Always disconnect the battery before you start working to prevent any electrical mishaps. Make sure the engine is cool to avoid burns, and have your tools ready. You’ll typically need a set of screwdrivers, pliers, a ratchet set, and possibly some Allen keys.
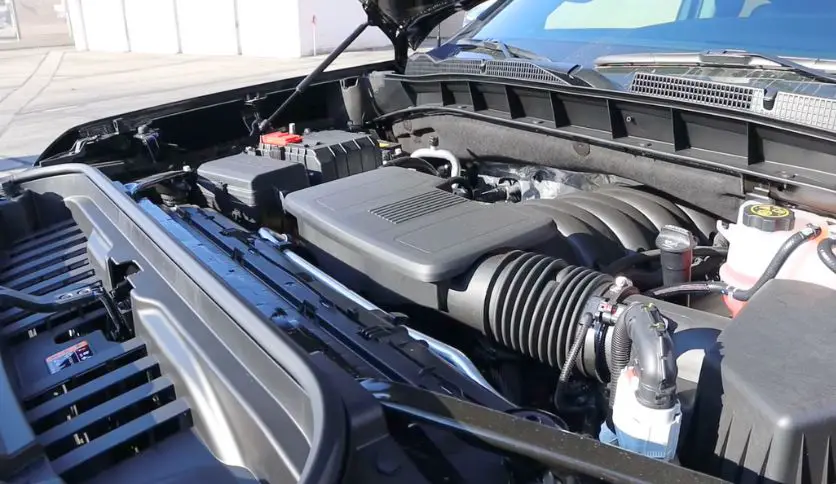
Removal of the Stock Intake System
Locating and Removing the Stock System
Your stock intake system is usually found on the top of your engine. Begin by carefully detaching the air sensor and loosening any clamps or screws holding the system in place. Remove the air filter box and intake tubes, keeping all parts and fasteners organized for later reference.
Installation of the Cold Air Intake
Installing a cold air intake (CAI) on your 6.2 Denali is a straightforward process that can yield significant benefits. However, it requires attention to detail to ensure everything fits correctly and functions as intended. Here’s how to go about it:
Preparing the New CAI Kit for Installation
Before diving into the installation, it’s crucial to set yourself up for success:
1. Reviewing All Components
Open the CAI kit and lay out all the parts on a clean surface. You should have an air filter, intake tubes, clamps, couplers, and possibly a new air sensor if included. Compare these parts with the inventory list provided to ensure nothing is missing. Familiarize yourself with each component; knowing where each piece fits will make the installation process smoother.
2. Reading Through the Provided Instructions
Every CAI is slightly different, and manufacturers often have specific steps for installation. Take the time to read through the instructions carefully. Look for any model-specific nuances that may apply to your Denali. Understanding the steps beforehand will help prevent any confusion during the actual installation.
Step-by-Step Installation Guide
With all parts accounted for and the instructions fresh in your mind, you can begin the installation:
1. Mounting the Air Filter
The air filter is the heart of your CAI system. It’s typically designed to be mounted away from the engine to draw in the coolest air. Find the designated spot for the filter, which may be inside the fender or near the front bumper. Secure the filter in place, ensuring it’s accessible for future maintenance. Some kits come with a heat shield or box to protect the filter from engine heat; if yours does, fit this around the filter as directed.
2. Attaching the Intake Tubes
Next, you’ll attach the intake tubes that channel air from the filter to the engine. These tubes should be routed to avoid any heat sources and moving parts. Fit the tubes together, usually starting from the air filter and working your way towards the engine. Use the provided couplers to connect the sections of tubing, and hand-tighten the clamps to keep them in place temporarily.
3. Securing Clamps and Couplers
Once all the tubes are positioned correctly, go back and tighten all the clamps. These clamps ensure that the tubes stay attached to the filter and the engine, providing a secure pathway for the air. A loose clamp can lead to reduced performance or even engine damage, so it’s essential to get this right.
4. Reconnecting the Air Sensor
If your CAI kit includes a new air sensor, or if you’re reusing the existing one, it’s time to reconnect it. The air sensor is crucial for your engine’s computer to calculate the right fuel mixture. Handle the sensor with care, avoid touching the sensor element, and ensure it’s securely connected to the intake tube.
Ensuring a Secure and Proper Fit
The final step is to make sure everything is fitted correctly:
1. Checking for Air Leaks
Start by visually inspecting all connections. Then, with the engine running, listen for any hissing sounds that might indicate an air leak. You can also use a smoke machine or spray soapy water around the connections and look for bubbles. Any leaks can lead to poor performance and should be addressed immediately by tightening clamps or reseating couplers.
2. Double-Checking All Connections
Go over each connection one more time to ensure everything is as tight and secure as it should be. This includes checking the fitment of the air filter, the tightness of the clamps, and the proper attachment of the air sensor. It’s better to spend a few extra minutes double-checking now than to have to troubleshoot issues later.
By following these detailed steps, you can install a cold air intake on your 6.2 Denali with confidence. Not only will this upgrade enhance the performance of your vehicle, but it will also provide a sense of accomplishment knowing you’ve personally improved your ride.
Differences Between Stock and Cold Air Intakes
When it comes to understanding the key differences between stock and cold air intakes (CAIs) for your vehicle, it’s essential to focus on the core areas that affect engine performance: airflow, temperature control, and filtration. Stock intakes are designed to provide a reliable balance for the everyday driver, offering adequate airflow with a focus on quiet operation and cost-effectiveness. They typically draw in air that’s warmer and closer to the engine, which can be less than ideal for creating the most power.
CAIs, by contrast, are engineered to maximize the engine’s breathing capability with less restrictive pathways, allowing for a larger volume of cooler, oxygen-rich air to enter the engine. This cooler air is key to enhancing combustion and, subsequently, can increase horsepower and torque. Additionally, CAIs often feature more sophisticated filtration systems that excel at blocking contaminants without sacrificing airflow.
While stock systems are low-maintenance and user-friendly, CAIs may require more frequent cleaning and a bit more attention to detail during installation. Ultimately, the choice between the two comes down to your priorities, whether it’s the no-fuss reliability of stock intakes or the performance-boosting potential of cold air intakes.
Post-Installation

Initial Checks
With the battery reconnected, start your Denali and let it idle. Listen for any unusual sounds that could indicate a problem. The engine should run smoothly without any sputtering or hesitation.
Test Drive
Take your vehicle for a test drive to observe the performance. You should notice improved acceleration and a more robust engine sound. Keep an eye on the dashboard for any warning lights.
Maintenance and Care
Keeping Your CAI in Top Shape
Regular maintenance will ensure your CAI continues to perform at its best. Clean and inspect the air filter according to the manufacturer’s recommendations, and be prepared to replace it when necessary.
Conclusion
Installing a CAI can be a rewarding project that enhances your 6.2 GMC Denali’s performance and driving experience. By following this guide, you’re well on your way to making an upgrade that you’ll appreciate every time you press the gas pedal.

Hello, this is Wesley Shelton, currently working in a car restoration company for over 5 years. Before that, I was a worker at a small car repair shop. As I was a car freak from a young age and worked as a professional for over half a decade, I think I now know pretty much everything about every car and its parts. To establish my name as a professional and help others by sharing my knowledge, I’ve created this website, which I work on whenever I get free time. I hope you’ve enjoyed my informative blog!
