
Hello, fellow GMC Sierra 1500 enthusiasts! Are you looking to enhance your truck’s horsepower, torque, and fuel efficiency? A performance chip might just be the upgrade you’re searching for. In this guide, we’ll walk through the ins and outs of installing a performance chip, ensuring you can rev up your Sierra’s capabilities with confidence.
Contents
How to Choose the Best Performance Chip for Your GMC Sierra 1500
Choosing the best performance chip for your GMC Sierra 1500 involves a blend of understanding your needs, ensuring compatibility, and considering the chip’s features. Start by defining what you want to improve in your Sierra—be it towing power, fuel efficiency, or overall responsiveness.
Next, verify that the chip is compatible with your truck’s specific year, model, and engine type. Compatibility is crucial for the chip to work correctly and not cause any issues.
Do your homework on different brands and read reviews from other Sierra owners. Their experiences can provide valuable insights into the chip’s performance and reliability.
Consider the features offered by the chip. Some provide a one-size-fits-all solution, while others offer customizable settings for a more tailored experience. Think about whether you want a simple plug-and-play option or if you’re willing to handle a more complex installation for potentially greater benefits.
Don’t overlook the importance of warranty and customer support. A good warranty can protect your investment, while reliable customer support can assist you with any questions or issues.
Lastly, balance the Cost for GMC Sierra 1500 Chip against the benefits. The most expensive option isn’t necessarily the best, and the cheapest may not meet your expectations. Find a chip that offers a good mix of price and performance improvements for your GMC Sierra 1500.
Pre-Installation
Tools and Materials Needed
Before we dive under the hood, let’s gear up. You’ll need:
- A standard screwdriver set
- A socket set
- The performance chip designed for your Sierra’s model year
- Safety gloves and glasses
Precautions and Safety
Safety first! Always disconnect the battery before you start. Park on a level surface and make sure the engine is cool to avoid any unwanted surprises.
Identifying the Correct Chip
Not all chips are created equal. Make sure you’ve got the right one for your Sierra’s specific model and engine type. There’s a buffet of options out there, from power programmers to control modules, so choose wisely.
Installation Process for GMC Sierra 1500 with a Performance Chip
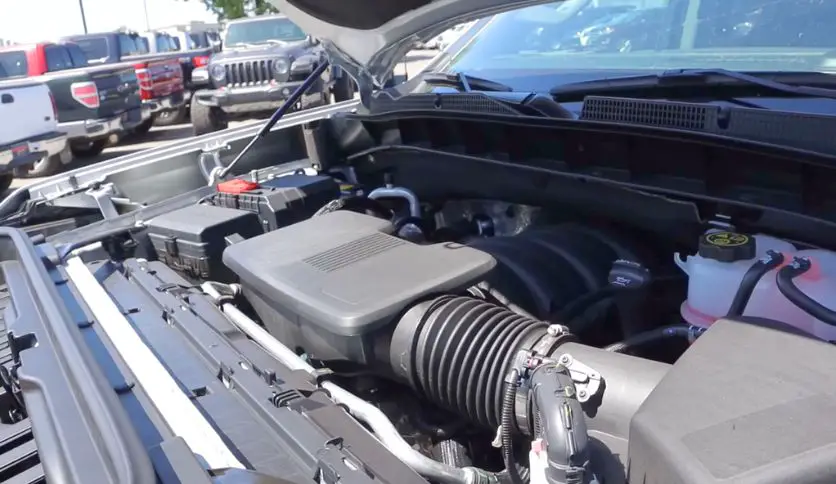
Accessing the ECU
Embarking on the journey to amplify your GMC Sierra 1500’s performance begins with a crucial step: accessing the Engine Control Unit (ECU). This nifty gadget is the maestro of your vehicle’s engine, orchestrating fuel delivery, air intake, and a myriad of other functions that keep your truck purring like a kitten on a warm windowsill.
Now, the ECU isn’t just lying around; it’s typically tucked away under the dashboard or nestled beneath the hood, shrouded in the mystery of your truck’s inner sanctum. To find this hidden treasure, you’ll need to consult your Sierra’s manual. This sacred text will reveal the ECU’s location and provide the incantations needed to access it.
Once you’ve located the ECU, gently remove any panels or covers. This is not the time for the brute strength of a lumberjack; use the finesse of a watchmaker to avoid snapping any clips or connectors. Remember, patience is a virtue, especially when it comes to the delicate innards of your vehicle.
Removing the Stock ECU
In some cases, your new performance chip will demand the removal of the stock ECU. This is where things get a tad more serious. The ECU isn’t just plugged in; it’s often bolted down, connected with a series of wires that look like they could jump-start Frankenstein’s monster.
Before you proceed, take a moment. Breathe. You’re about to perform surgery on your truck’s central nervous system. Disconnect the battery to prevent any electrical mishaps, then proceed to disconnect the ECU. Handle it with the care of a newborn — after all, this little box is the brain of your Sierra.
Once removed, store the stock ECU in a static-free environment. Think of it as putting your first teddy bear into storage; you may not need it now, but it holds the key to your truck’s original identity.
Installing the Performance Chip
With the stock ECU out of the way, it’s time for the star of the show — your new performance chip. This little marvel is about to take your Sierra from “just another truck” to “road-conquering hero.”
Align the chip with the ECU’s connectors. It should fit as snug as a bug in a rug. If it doesn’t, stop. Double-check the instructions. This isn’t a matter of ‘close enough’; it’s either a perfect fit, or it’s not right. If you’re sure everything’s lined up, gently press it into place. You should feel a satisfying click — the sound of your truck’s potential unlocking.
Reassembling and Finishing Up
The chip is in place, and it’s time to reverse the disassembly ballet you performed earlier. Replace any covers or panels with the same gentle touch you used to remove them. As you reassemble, keep an eye out for any loose connectors or wires that may have been nudged during the process.
Before you declare victory, give everything one last review. It’s like leaving for vacation — check twice so you don’t have to run back because you forgot to turn off the stove. Once you’re certain everything is as it should be, you can reconnect the battery and prepare for the moment of truth.
With the installation complete, you’re not just a truck owner; you’re a tuner, a DIY guru, a magician who’s breathed new life into your GMC Sierra 1500. Get ready to experience the road like never before.
Post-Installation
Reconnecting the Battery and Initial Start-up
Reattach the battery and start ‘er up. Keep an eye out for any unusual lights on the dash — no one likes an unexpected check engine light.
Programming the Performance Chip
Some chips come with customizable settings. Play around with them to find your sweet spot. It’s like choosing the right hat for a sunny day — make sure it fits just right.
Test Driving and Observing Changes
Take your truck for a spin. Feel the difference in how it handles and responds. It should be like a fresh pair of socks — noticeably better.
Maintenance and Troubleshooting
Maintaining Your Performance Chip
Keep an eye on your new setup with regular checks. If your chip has software, keep it updated like you do your smartphone.
Troubleshooting Common Issues
If something doesn’t feel right, don’t panic. Many issues have simple fixes. But if you’re stumped, it’s okay to call in the pros.
Conclusion
Congratulations! You’ve successfully navigated the technical twists and turns of installing a performance chip in your GMC Sierra 1500. This isn’t just a minor tweak; it’s a transformation that unlocks a new level of driving experience. By enhancing the brain of your vehicle, you’ve taken a bold step into the world of customized performance.
This mini-makeover is more than just about boasting rights or the thrill of DIY success. It’s about tapping into the untapped potential of your truck, fine-tuning it to respond to your unique driving style and demands. Whether it’s for better fuel efficiency on long hauls, more torque for towing, or just that extra bit of power for the sheer joy of it, you’ve personalized your ride in a way that factory settings could never deliver.

Hello, this is Wesley Shelton, currently working in a car restoration company for over 5 years. Before that, I was a worker at a small car repair shop. As I was a car freak from a young age and worked as a professional for over half a decade, I think I now know pretty much everything about every car and its parts. To establish my name as a professional and help others by sharing my knowledge, I’ve created this website, which I work on whenever I get free time. I hope you’ve enjoyed my informative blog!
